Update an old room, or take on this essential second fix job yourself with our easy step-by-step guide
Whether you plan to change the look of a room by swapping the skirting boards or take on this essential second fix job in your self-build project, you’ll find it both satisfying and relatively straightforward if you follow this DIY step-by-step guide to fitting skirting boards.
If you are planning to lay a new wooden or tiled floor, do this before you fit the skirting boards for the neatest finish. If you’re carpeting, fit the skirting boards first. Carpet fitters like to have a clean, straight edge to work to and in the future you won’t have to tear the skirting boards off if you want to change the carpet.
Tool List | Materials |
|
|
Step-by-step
1. Measure up the area you are fitting out with skirting boards and add 20 per cent onto the total figure as a contingency for cuts.

2. Some skirting boards have a different profile on each side of the board. Decide on the profile that you are going to use and mark this face on all the boards with a pencil to prevent a mistake being made later on.

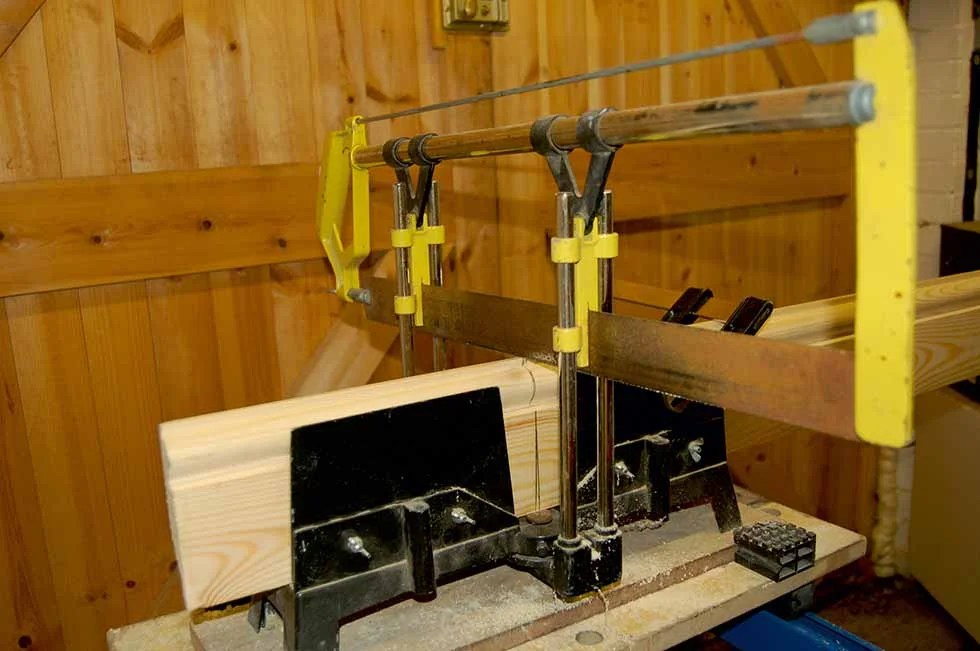
3. To give yourself a simple start point, measure up, cut and fit (SEE STEPS 10 AND 11) any pieces of board that can go in ‘square-edged’ on both ends (as in either side of a chimney breast, for example). Mitre saws (AS SHOWN) and mitre boxes can both be used to get a good straight cut.

4. If you are working out from an internal corner then the next board to go in needs to be ‘scribed’ so it will slot into the board you have just fitted. To do this, first cut a 45 degree angle in the board using a mitre saw or mitre box.

5. Use a coping saw to cut away the waste section of the mitre and you’ll be left with the profile of the skirting board (INSET). If the moulding is fairly intricate it can take a bit of practice to get right — have a go with some offcuts first.

6. Check the fit of the two boards. If you’re happy with the way they look, you can cut or mitre the other end of the scribed board to length. Plan the way your boards go in to avoid the need for a board with scribes at both ends. Scribing both ends of a board calls for extremely accurate measuring and cutting. By simply leaving one end of the board square and scribing the adjacent board into that, you instantly get round the problem.

7. Where boards meet on an external corner they are mitred at 45 degrees to form a neat joint. Measure to the corner and then mark this length on the back of the board to be cut.

8. Put the board face out into the mitre saw, line the saw up with the mark you made in the last step and cut.

9. To create the opposite side of the mitre follow steps 7 and 8 again but remember to cut the 45-degree angle in the opposite direction so the boards meet like this.With the mitre saw you create the opposite cut by moving the saw to the other side of its axis.

10. Fix the boards to the walls as you cut them to size, but fit mitred external corners in pairs so you can adjust them to fit together accurately. Instant grab- type adhesive is a very popular way of fixing boards, particularly in houses with plasterboard dividing walls. To do this you can apply blobs of adhesive or run a couple of beads along the back of the board. Press the board firmly to the wall so the adhesive makes good contact, and wipe off any excess straight away.

11. If you want to screw the boards to a plasterboard wall, mark the position of the wooden studs and then put a pilot drill through the skirting board and the wall at these points. If you are fixing to a solid wall, run a pilot drill through the skirting board to mark the wall behind every 600mm. Drill and rawlplug these holes. Before you insert the screws, countersink the holes with a larger drill bit so the screw heads will disappear when fixed. Screws should be long enough to go through the board and at least 30mm into the wall or studs behind. Use wood filler to cover over the countersunk screw holes before painting.

12. Any gaps between the wall and the top of the skirting board can be filled with decorator’s caulk. For a neat finish, run a damp finger along the join.

© 2017 – 2018, Best Brothers Group. All rights reserved.


